Editing Vectors
When a vector is selected, you can perform a variety of transformations and editing operations. In this video we will look at using the Transform Tool to Rotate, Resize and Skew vectors.
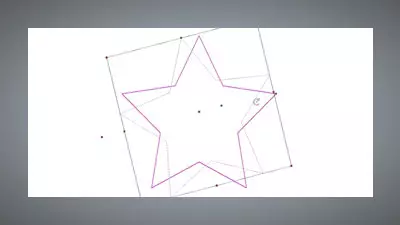
When a vector is selected, you can perform a variety of transformations and editing operations. In this video we will look at using the Transform Tool to Rotate, Resize and Skew vectors.
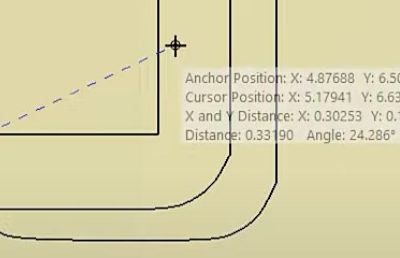
In this tutorial we're carrying on the theme of how to make your model even more precise. We show you a variety of methods to measure your designs, whether you want to measure the whole model or a particular set of vectors. By adding tools such as rulers and using our very own measure tool,...

The V-Bit Carving Toolpath allows you create a faux 3D effect using the shape, or angled profile, of the V-Bit tool. It's most frequently used on lettering for signage and plaques.
The Scale Relief tool within Carveco allows you to increase or decrease the Z-height of 3D Relief artwork either freeform (using the red drag handle) or to a specified Z-height. Further controls let you preserve any detail even at very shallow heights - perfect for low-relief applications such as coin making or engraving.
Using the Mirror tool allows you to Mirror a vector either about itself, or in a variety of directions. You can also use a selected vector line to further control the direction of the mirror.

Carveco gives you a few options when it comes to adjusting the size of your model, with setting to preserve the size of your artwork or adjust to the new size. In this video, we'll walk you through how to adjust the model size and update the origin to accommodate your changes. Always remember to...

Bevel Carving, or Prismatic Carving, can be thought of as V-Bit carving in reverse - using a V-Bit tool to profile the outside of a vector, creating a raised, angled effect. Much like V-Bit Carving, this is most commonly used for lettering in signage and woodworking or engraving.

The Invert Relief tool allows you to quickly invert a 3D Relief model so that the model sinks into the material, to effectively create a mold of your 3D design. You can also mirror your design to produce matching top and bottom halves when machining a model.
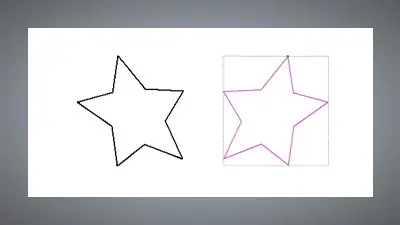
Joining Vectors or closing open vectors is an essential skill to ensure problem free machining. In this tutorial we'll show you how easy it is to automatically close vectors, amend tolerances to ensure the correct vectors are joined and also we'll look at the different options available for manually joining vectors together.